Showing posts with label Gluten Free Baking. Show all posts

Saturday, 31 January 2015

Adapting to the gluten free lifestyle

This post is designed to lead on from 'Diagnosis of coeliac disease' so you should read that first.

Having received the results of my Coeliac test, the news slowly began to sink in. I gave up gluten more or less straight away, before I went to the follow up appointment or saw the dietician. At first I didn’t take it all that seriously, which was a bit of a mistake. I used the same toaster for my gluten free bread as for normal bread, and shared jars of spread with gluten crumbs. I did check ingredients lists for gluten but sometimes I bent the rules somewhat. For example, I was on a journey somewhere and I wanted one of those little packs of sushi for lunch, it said it had wheat in it from the soy sauce. I bought it anyway and just didn’t use the soy sauce, when really the sushi itself could have had soy sauce in it.
Dirty gluten crumbs

The hardest thing to give up were bread and beer. Bread was difficult because my mum was just starting to get good at baking and I couldn’t eat her bread anymore. We went on a gluten free artisan baking course to try and learn how to make nice gluten free bread. However, the course seemed to be more focused on avoiding additives and using natural ingredients than producing decent bread. If you remove gluten from bread, which normally relies on this for structure, texture and is essentially what makes bread bread, you’ve got to replace it with something. Usually this is xanthan gum, guar gum, chia seeds or egg. Some of the bread we made tasted quite nice, but they didn’t really hang together.


Giving up beer was hard because I was an ale drinker. I used to drink cider but I would often end up coughing with an itchy throat and being sick, I realised this was because I was allergic to apples and so I was left with alcoholic ginger beer as my thirst quenching beer-like drink. However, I don’t think alcoholic ginger beer is a session drink. For a long time I mainly drank wine in pubs, or wine spritzers in the summer. In summer 2014, I decided that my quality of life would increase a lot of I were able to drink cider. I take anti histamines everyday anyway, so I thought it wouldn’t be too bad, and it wasn’t. It did make my mouth a bit itchy at first, and I started off by just drinking half pints, and trying out perrys first, because I’ve always been less affected by pears than apples. Now I can drink cider with no problems at all.
I think having started being a bit slack made it more difficult to adjust to being gluten free. I visited the dietician who emphasised how important it is to be properly 100% gluten free if I want my insides to get better, even when I’m not having symptoms.
Now I have my own toaster, which I’ve written on with a sharpie:

I’ve also used toastabags when I’ve been on holiday, but at home it’s easiest just to have my own toaster since they’re only £5 from a supermarket. I also have put ‘GF’ labels on my jars of things that might end up being contaminated:


My lovely flatmate at uni was so understanding that he even put this label on one of his jars when we both had the same pesto:

I always clean up crumbs before I cook now. I do feel better than I did when I was eating gluten- the main thing is that I get ill a lot less often and when I do get ill I get better a lot quicker. My advice to newly diagnosed coeliacs would be to take the gluten free diet seriously from the offset. Try to learn how to explain the disease and answer questions that you will inevitably get:

So what is coeliac disease, is it an allergy or something? It’s not an allergy or intolerance, but an autoimmune disease where the presence of gluten in the diet triggers the immune system to attack healthy tissues in the body. This causes damage to the digestive system, which can cause diarrhoea and vomiting.

If you eat this (holds up piece of bread, for example), will you have to go to a and e? No, but I will feel pretty ill for the next couple of days and it will effect me for several months.

If it’s not that serious, why don’t you just try a sip of my beer? Or a corner of this biscuit? Because even a little bit will still make me ill!

Oh my (friend/aunt/brother) is gluten free, but they know their threshold so they can eat like one sandwich a week or a pint every other day or something… Some people with intolerances are able to tolerate a certain amount of gluten without any ill effects, it’s different for Coeliacs, even a small amount of gluten will damage my insides.


Good luck!

Friday, 28 February 2014

Gluten Free Baking: GFOASS- lean crusty white sandwich bread

I got the recipe book ‘Gluten Free on a Shoestring (GFOAS) Bakes Bread’ for Christmas, it’s written by Nicole Hunn, author of the blog by the same name. The recipes are vastly different from those I’ve tried before, which were mainly using a batter. It took me a LONG time to compile the ingredients and cost A LOT of money! I had purchased almost all the ingredients, including whey protein isolate which cost around £13 (enough to make ~2 loaves), when I realised that one of the ingredients, expandex modified tapioca starch, is not available in Europe! I really thought that was the end of the road for a time, until I read here (number 6) about the replacement, Ultratex, which cost about £23 including delivery! However, I have only used a miniscule amount so far. So I mixed up my gluten free flours in a large tub, and headed back to Glasgow ready to bake my first loaf. I’d decided on the loaf ‘Lean Crusty White Sandwich Bread’, because it said that it was going to change my life! Reading through the recipe I encountered another problem- one of the stages requires a bowl of dough to be left in the fridge for 12 hours-5 days. Which means that I had to carefully coordinate everything to when my flatmate and I had an almost empty fridge!

So first I had to make a starter, which was basically the flour mix, yeast, sugar and warm water whisked up. This is what it looked like:

I left it in a warm place for about 40 minutes and it grew into this:

I mixed the remaining dry ingredients:

And added the starter to them:


This is where I met my next problem which, ultimately, lead to my downfall. I was supposed to knead the dough in a stand mixer with a dough hook. I don’t have a stand mixer, so I had to improvise. The book suggested using a wooden spoon. I put the ingredients for the dough into a bowl and attempted to mix them with a wooden spoon. It really wasn’t possible; it was like trying to stir play dough- something that is basically solid. I opted instead for kneading by hand; the mixture was so sticky I didn’t dare put it onto my work surface. I air kneaded the dough, which basically involved pulling it apart with my hands and pushing it back together again. I did this for a full 10 minutes! I could feel it drying on my hands, like a clay facemask, but I persisted because I felt like kneading by hand for 10 minutes was roughly equivalent to kneading on medium speed in a machine for 5 minutes. Of course, the problem was my hands were hot, whilst a dough hook would be fairly cold. I wasn’t really sure what the dough should feel like at this point, so I carried on, and put it into an oiled bowl in the fridge for about 36 hours:

When I was ready to bake, I greased my baking ‘tin’:


This is what my dough looked like before I got going:


I added a bit more flour and turned it over on itself a few times, as per the instructions, and managed to shape the dough fairly successfully:


I then set it aside for rising:


I left it for about 2 ½ hours, it hadn’t quite risen to the top of the tin, but I didn’t want to leave it any longer because the recipe said only around 1 ½ hours:


I made the slash and it was ready for the oven:


To cook it I had to put it in the cold oven and then turn the oven on, which I was a bit worried about but it turned out ok. Here it is just after cooking:


This is the loaf out of its tin:


It certainly looked the part, and smelt good. However, it’s when I tried to cut the loaf that my heart sank. It was hard, really hard, to cut through. This is what it looked like inside:


It had a very dense crumb and was pretty dry. The texture was pretty bad if I’m honest, really dry and stale-like. The crust was pretty good, and the flavour was very good. It tasted just like bread! The flavour was quite sweet and yeasty, with a slightly acidic tanginess. This is what a single slice looks like:


Overall, I’m very disappointed. The book is called gluten free on a shoestring, meaning cheap, and this is far from it! It’s hard to estimate the real cost per loaf because I used different amounts of each flour, but it can’t have been far off £10! I get gluten free food on prescription, and living in Scotland there’s no prescription charge, so a loaf has to be really special for it to be worth forking out on time and time again. It just didn’t live up to my expectation of it, as a lean crusty white tasty loaf. Now I’m left with around enough mix to make one more loaf from this book, and I don’t know what to do with it! I don’t want to be disappointed again, I want to bake something that’s going to work!

Sunday, 24 November 2013

Gluten Free Baking- Large White Oven Loaf

Now term has started again, I'm living in a modest sized flat in Glasgow, with a very modest sized kitchen! Living at home over the summer, the kitchen I could use was rather large:-
This is the current kitchen in my flat:-
For this reason, it has been a lot more difficult to bake recently! Also, I don't have large amounts of space to store large amounts of flour. And my oven doesn't get very hot (175 degrees if your lucky). So I decided to bake my most consistently successful loaf. It doesn't taste particularly exciting, but the texture and fact it has always worked make it a good loaf. The main ingredient is glutafin select multipurpose white mix:

I get this on prescription and use it in a lot of recipes, and as my general flour for thickening sauces etc. It's worth pointing out that this mix contains wheat starch, which is not suitable people who are intolerant/ sensitive to wheat. The wheat starch is processed to remove the gluten, so of course it's still gluten free. It's also only available on prescription, available to anyone medically diagnosed with Coeliac's disease. The recipe can be found here as can a lot of other recipes specifically designed for this flour. 

This is what the ingredients looked like:

The recipe is quite simple, first, mix up the dry ingredients:

Then, stir in the wet ingredients:

Put it into the loaf tin, this is what it looked like before around 20-25 minutes of rising:

And after rising:

I then baked it for about 35 minutes. It came out looking like this:

This is what it looked like cut, and a slice of it:


The loaf had a very nice texture, very fluffy, light and springy and had risen very well. A lot of shop bought gluten free loaves are very small, so it's nice to have something more normal bread sized to make sandwiches etc. The flavour was quite nice, but it didn't really taste of much. You could taste the olive oil, which was quite peppery and the dried milk as well, which is a bit odd. 


The best thing about this loaf is that it's easy and quick to make, and fills me up more than smaller loaves.

Sunday, 8 September 2013

Gluten free baking- seven grain loaf

I wanted to try bread from a different recipe book to see if it was more successful, so I made the seven grain bread from ‘Gluten Free Baking’ by Michael McCamley. The basic recipe was very similar to previous ones, mix the dry ingredients:

Mix the wet ingredients:

And then add the dry to the wet. At this point the dough was very firm and stiff, whilst the recipe stated it should be soft dough. Nevertheless I allowed it to rise for about an hour in the tin:

However, after an hour the dough hadn’t risen at all, it was still at exactly the same height. I decided I needed to add more water to allow the dough the looseness required to rise. So I added more water and remixed the dough, unfortunately I forgot to measure how much extra water I ended up adding. This is what it looked like after I added more water:

The dough was slightly paler because the yellow from the egg yolks had been diluted more. This time the dough actually rose in the hour:

I baked it at 180C for about 50 minutes. This is what it looked like when it came out:

The crust had gone golden brown and hard, which was promising. The loaf was fairly difficult to slice, which implied that the crust would be nice and crunchy. Here it is cut open:


The crust was not actually that crunchy to eat, so maybe the loaf could have done with a bit more cooking. The crumb was quite dense and moist, so the loaf might have benefited from further rising time, and possibly more yeast. However, the denseness was beneficial in preventing loaf from falling apart. The taste was very good, quite nutty, complex with a hint of sweetness. The flavour of the eggs came through but was by no means overpowering the other flavours. Overall the loaf was good, but the recipe was fundamentally flawed, if I hadn’t added in my own liquid then the loaf would have been very dense. It’s important to be prepared to experiment and improvise when baking gluten free- even when following a recipe!

Tuesday, 27 August 2013

Gluten Free Baking- Double-baked Cheese Soufflé

Souffle is not something I’ve eaten much of, even before diagnosis, but something that I’ve always found quite intriguing. The mousse like texture of soufflé is appealing and I thought I’d give it a try. I made the double-baked cheese soufflé from the Hamlyn all colour cookbook ‘200 gluten-free recipes’. These are the ingredients I used:

The recipe involved making a rice flour based cheese sauce, into which whisked egg whites are folded. The cheese I used was a Cheshire blue and the mixture also contained chives, thyme and mustard. This was then baked for 15 minutes at 180C, here they are in the oven:


After the first bake they had gone golden, but not risen very much. They looked like this:


The soufflé then had to be left to cool completely before the second bake. Before baking again, a mixture of double cream and grated Parmesan was poured on top. Here they are just before the second baking:


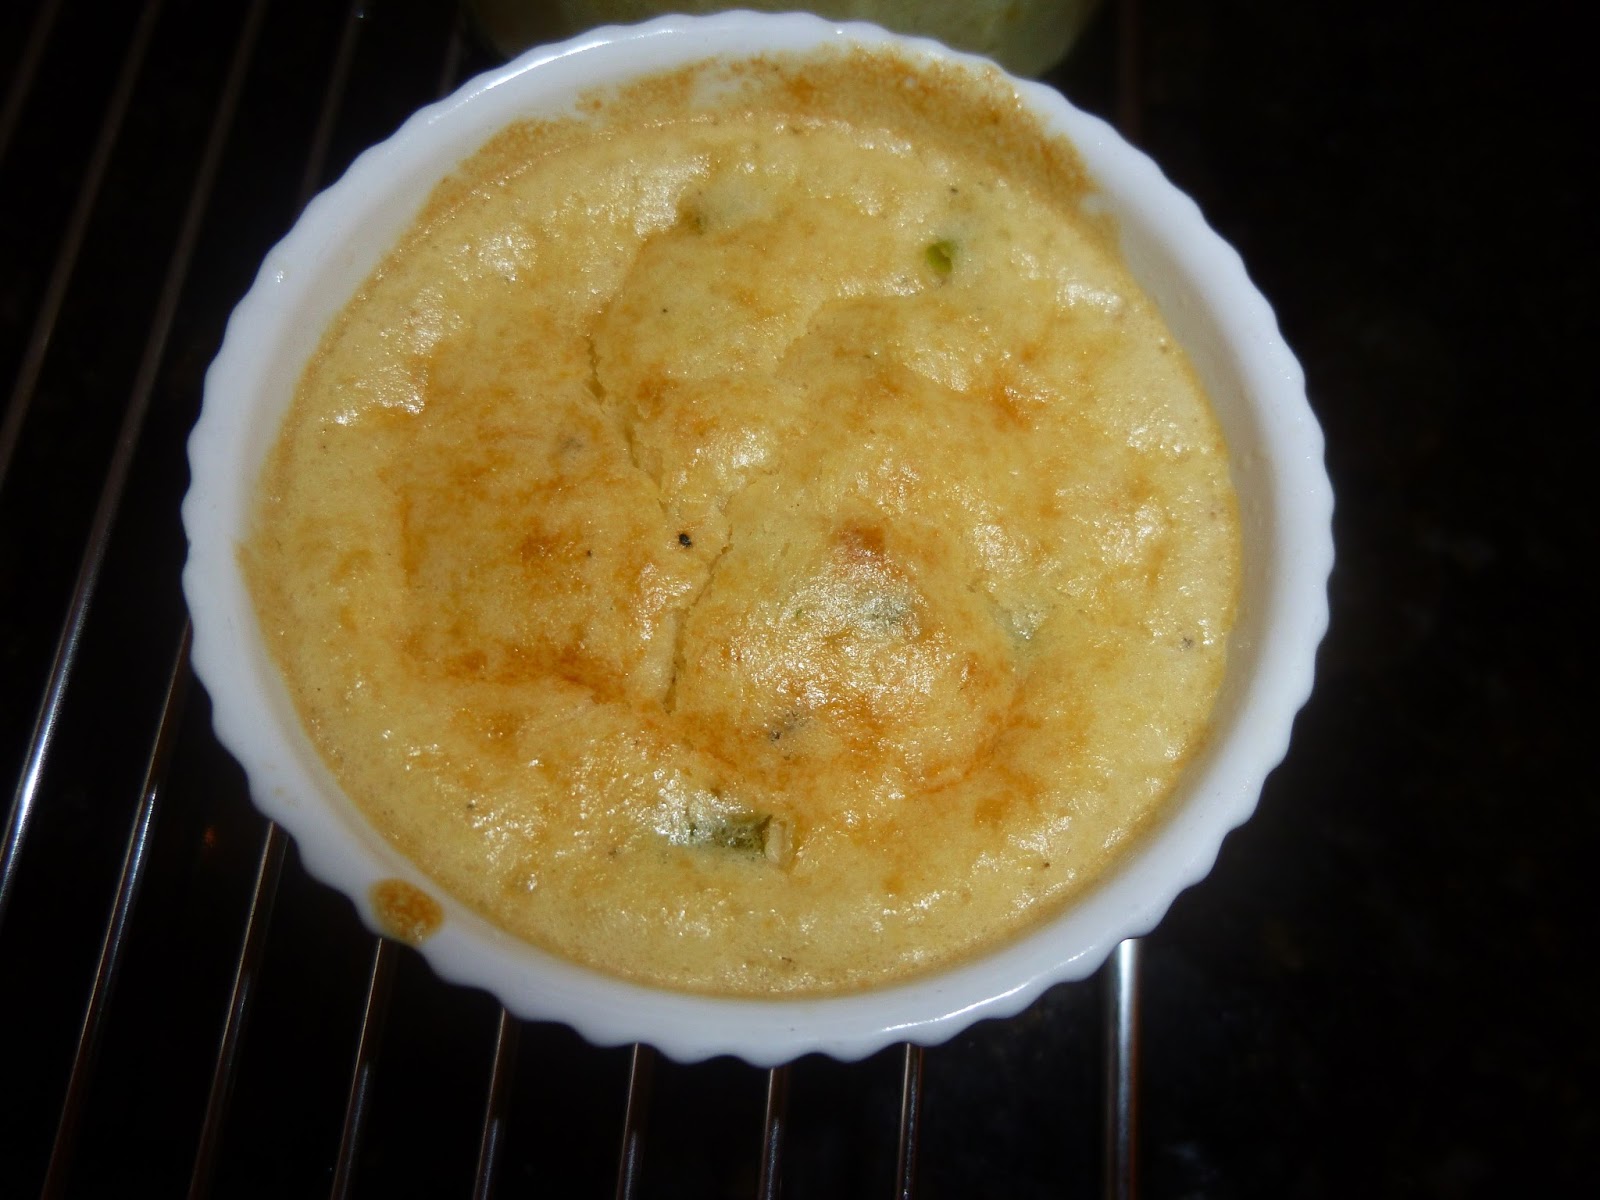
This time they were cooked for 10 minutes at 220C. This is what they looked like when they came out:


They have risen a little but unfortunately soon sunk. The soufflé had a really great flavour, very cheesy and creamy complemented well by the herby flavour of the chives and the subtle hint of mustard. The texture was very pleasing; the lower layer was a dense mousse, thick and creamy. The upper layer was quite wet and cream like still, it probably needed a little longer which would have allowed it to stay up after it had risen. The Parmesan in the upper layer had melted to a stringy consistency, which made eating it even more interesting. Here is a picture of the texture inside:


You can see the mousse like texture lower down with the wet cream above and Parmesan skin on top. The soufflé was very good and surprisingly easy to make, definitely something I’d try again, maybe a sweet one next time.